Introduction:
Hi and welcome! Here's a tutorial for a seven rosette TMC (tape measure cover) pictured below. It's a fun and fast project—done in one sitting.

Warning: Making TMCs can be addictive. I know because I have now made over 40 of them in a very short time.
This "addiction" all started because one of my fiber friends, maryootsy, kept coaxing me to try a flower pattern created by JuleeQue.* Well, I didn't have one of the little retractable tapes to execute it, so Mary finally sent me two of them all the way from Michigan and that meant there wasn't any excuse left not to try Julie's free pattern.
[*ravelry names]
[*ravelry names]
Once I made Julie's single flower TMC, I was off and running with all kinds of ideas—flowers, sweet treats, fruits, veggies, even a frying pan with bacon, eggs and pancakes. The possibilities were seemingly endless.
For some time I wondered what I would offer as a pattern here on my blog and then a few days ago, when I was completing a sweet little girl's knitted set of mittens and a hat and wanted to jazz up the mittens, I came up with crocheted rosettes at the wrists and it clicked. That's what I would share—a rosette TMC.
Description:
The instructions given here are for a tape measure cover with seven crocheted rosettes on the top like the one pictured above. The crocheted main body will just be a springboard, however, because once you crochet the bottom, sides and top to cover the retractable tape measure, you will have the basis to make all kinds of TMCs. Just let your imagination run free—that's what I did. You can see some of my one-of-a-kind TMCs in a later photo on this page.
What You Will Need:
• A small (2 inch diameter) retractable tape measure.

• Yarn in various colors: regular 4 ply yarn for this pattern, 3 ply is best for the leaves and some of the rosettes**
• Crochet hook, size G or F, depending on the yarn
• Scissors
• Tapestry needle and a sharper needle with a larger eye, if you plan to stitch on your rosettes, rather than glue them
• Glue gun or heavy-duty glue
** For U.S. residents, you can find little retractable tape measures for 99 cents in the notions department at Hobby Lobby. Other possible sources: some dollar stores carry them; a box of 20 can be ordered from JoAnn's, but be sure to use a coupon for percents off to defray the cost.
*One of the advantages of creating small projects, such as this, is that you can use up bits of yarn. Even if you decide to use yarn from your large skeins, one TMC takes so little, you will have plenty left for big projects.
Making the TMC body:
Foundation, Bottom
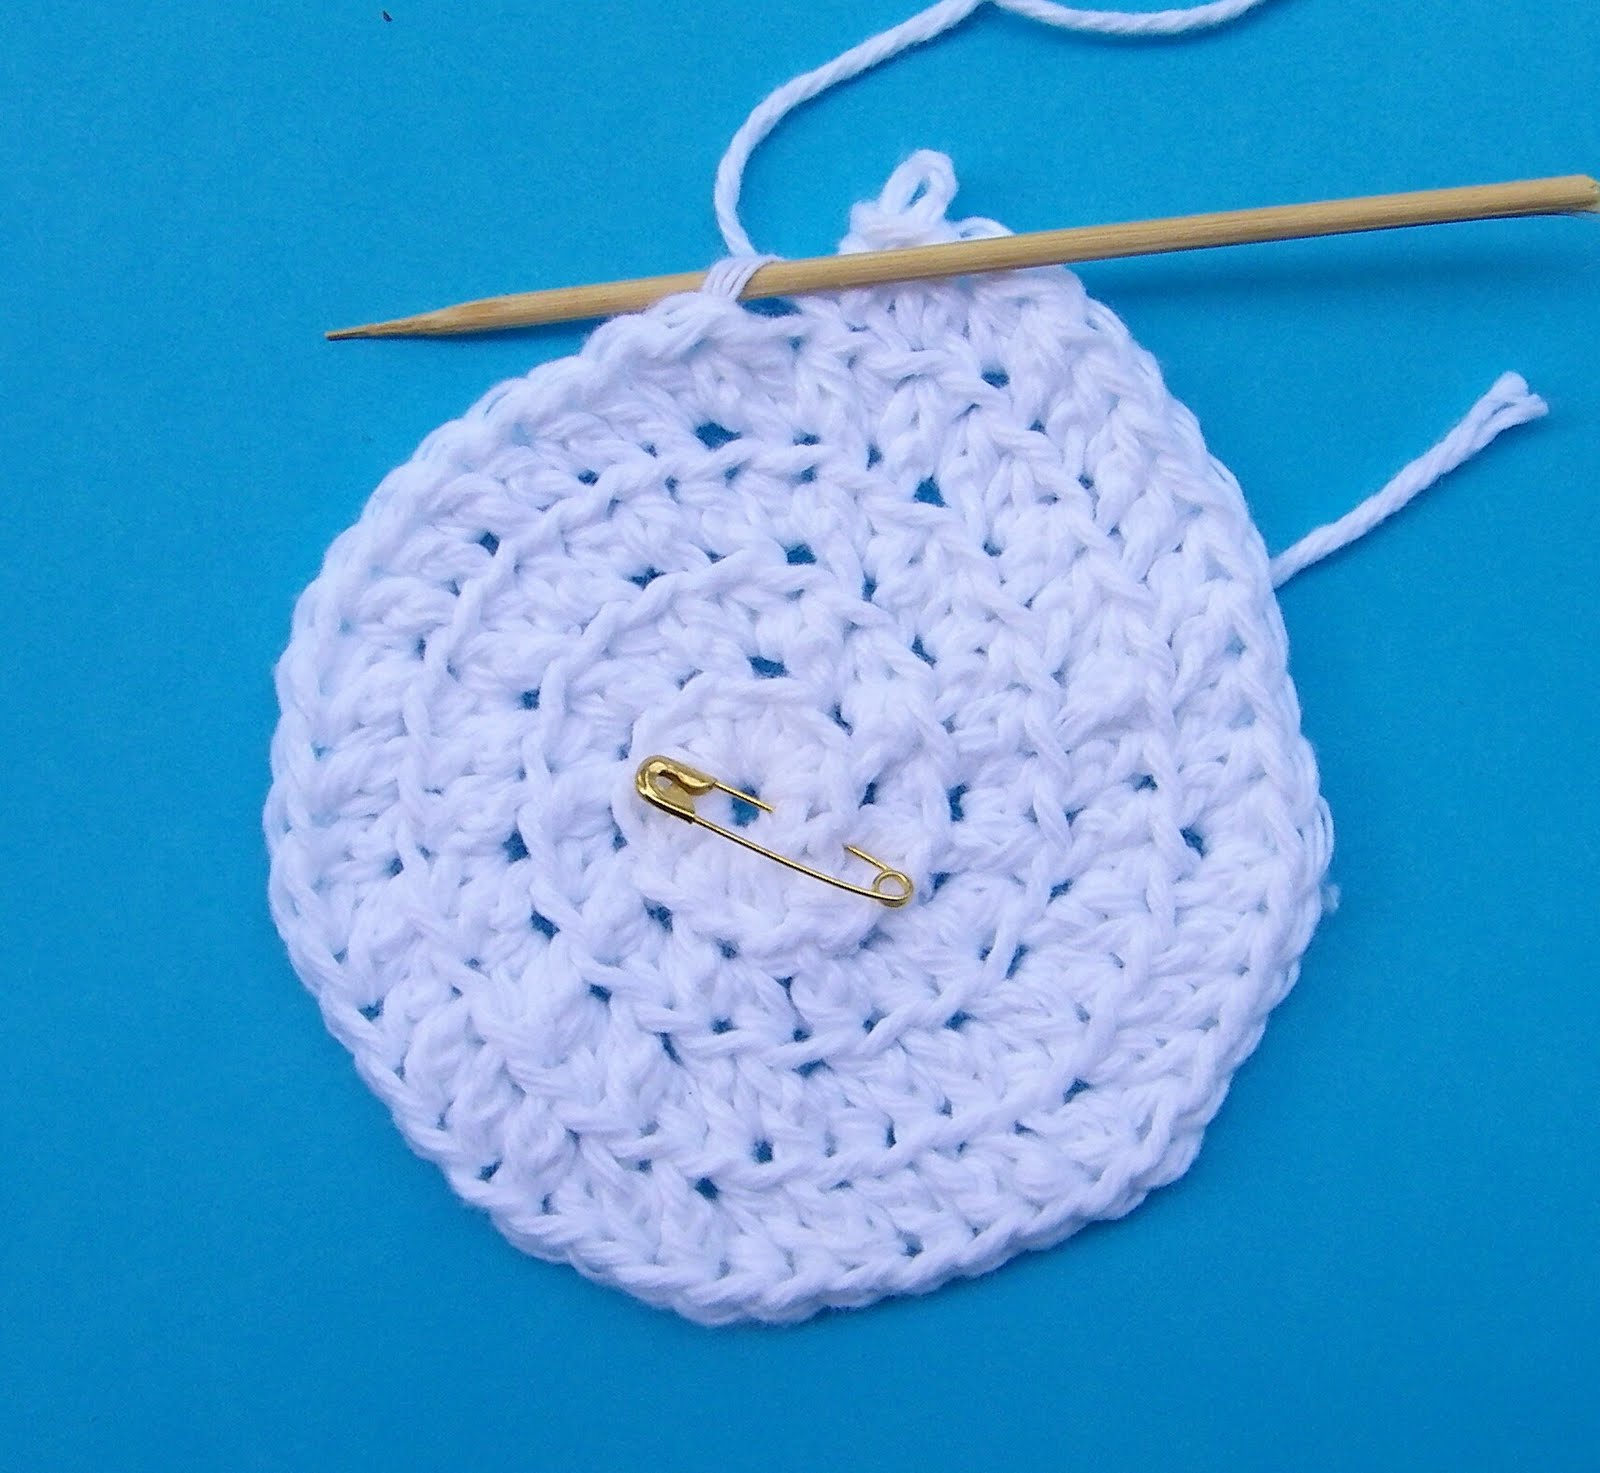
Ch 4, slip st to form a ring.
Round 1: Ch 2. For most yarns you will hdc into the ring 12 times. Sl st to the top of the first hdc. If you are using a heavier or coarser yarn, such as Red Heart Super Saver, you will need to do fewer hdc’s to start. If you are using a finer yarn, such as sock yarn, you will need to make more hdc’s into the ring to start.
Round 2: Ch 2, hdc into the same st. 2 hdc’s in the tops of each of the st’s around. Sl st join/end the round. If you are crocheting with a heavier yarn, you might need to assess if you will need to make the next row hdc’s or sc’s.
Round 3: Ch 2, hdc into the same st. *(1 hdc into the next st, 2 hdc’s into the following st). Repeat from * around. Sl st to join. If you are using thinner yarn, you will likely need to add a row of sc’s after round 3 to make the circle large enough to accommodate the 2 inch (5 cm) diameter of the retractable tape measure.
SIDE
Row 1: Working in the back loops of the last row, hdc’s around minus three st’s evenly placed. In other words, you will reduce this round by 3 sts. DO NOT JOIN when you reach the end of the row. The purpose of not joining is that an opening is being left for the end of the tape to protrude.
Row 2: Ch 2, turn so that the wrong side is facing and hdc in the tops of each of the st’s around. (See photo right.) If you are crocheting with a thinner yarn, you may need to add a row of sc’s after row 2. Join the last st to the starting st with a sl st to join. Cut yarn and secure tail.
 Place tape measure inside with the retractable button on the bottom and with the pull tab protruding from the side opening created for it. (See photo left which is the inside of the piece.)
Foundation, Top:

You are going to make the top the same as the bottom. No sides on the top piece. When done, leave a yarn tail, about 20 inches (50 cm) long, which will be used to whip the top piece to the already completed bottom and sides with the tape inside. (See photo right.)
For future TMCs, if you are decorating the top, don’t whip together until you assess whether or not it will be easier for you to decorate the top while it is separate.
Leaves:
It is preferable to use a slightly lighter weight yarn for the leaves. These leaves were made using Red Heart Soft yarn which is almost the same as sports weight (3 ply) yarn. Using your F hook, if you have one, ch 9. Sl st in third st from hook, sc in next 2 st, hdc in the next 2 sts, dc in the next st, 4 hdcs in the last st. Now you are going to go back up the other side to start or tip of the leaf. Hdc in the next st, sc in the next 2 sts, sl st in the next st. Cut yarn and with the yarn tail of about 10 inches (25 cm), make a sl st into the top.
 With your needle, bring the yarn back up to the front just under the leaf tip and make stitches along the center to the base of the leaf. Backstitches will make a nice stitch down the center (see photo right) plus end your yarn at the base end where you can easily tie it off without it being seen on the underside when you glue it in place. If, however, you want to stitch your leaf to the top of your tape measure, you would leave yarn tails for this purpose.
Rosettes:
 You will need 7 rosettes for the top of your tape measure. If you have slightly lighter weight yarns, such as sports weight (3 ply yarn), it will be best to make all or some of the rosettes from this yarn. If not, your rosettes might be a little large for the top. Even if you can make some of 3 ply and some of 4 ply, it would help. For each rosette, using your G hook, ch 12. Then make 2dcs in the third ch from the hook and 2 dcs in each ch to the end. The rosette will naturally curl like the photo in the left. This is how it looks without doing anything to it. With your yarn tail and tapestry needle, stitch the rosette with a few stitches so that it stays together. If you plan to stitch the rosettes on the top, leave yarn tails. If you plan to glue or glue gun, fasten off your ends.
You might want to make more than the seven rosettes so you can choose which ones seem to go best. Then generally position them to see how they look before transferring to your tape measure, like in this photo below.

Assembly:
 Place your leaves in an arrangement that seems satisfying and attach them first by gluing or tacking into place with yarn ends. Next attach your center rosette. This one is the largest of the rosettes in the final ones chosen. (It wouldn't have worked well to be an outer rosette because of the size.) After the center rosette is secure, place the remaining 6 rosettes around it. All done!
Variation:
Another way to make rosettes or roses, is from strips of felted wool rolled up and then attached with needle and thread at the base. Actually, I made these before the crocheted kind but, knowing that not everyone has felted wool from old sweaters in abundance, as I have, I came up with the crocheted version. However, you might want to see how beautifully this variation of wool roses turned out. Most of the leaves are simply cut from felted wool but a few are crocheted. Nice, huh?!

Varieties:
Here are about a third of the TMCs I have made. The free pattern by JuleeQue is the rose, upper left between the frying pan and the turquoise hat. I sent this one to maryootsy because this is the one she wanted me to try. Other TMCs in this photo: oreo cookies, cherry pie, lemon, orange, grape (2), watermelon, cupcake, dog, flower with a yellow button center and the frying pan complete with breakfast.

Patterns on Etsy:
I have an inexpensive pattern for making the grape, watermelon and citrus TMCs in two of my Etsy shops. Here are the links.
CLICK HERE to access my 2Good2Eat shop.